Scheduled AI Prompts (Beta)
Overview
Scheduled AI prompts are in open beta starting with Panther version 1.120 and are available to all customers. Please share any bug reports and feature requests with your Panther support team.
Scheduled AI prompts allow you to automate recurring AI-powered security analyses on a defined schedule. Instead of manually asking Panther AI to triage alerts, summarize security posture, or analyze alert queues, you can configure prompts that run automatically and produce AI conversations with findings.
Create a scheduled prompt
To create a scheduled prompt:
In the left-hand navigation bar of your Panther Console, click Panther AI > Scheduled Prompts.
In the upper-right corner, click the + button.
Fill out the following fields:
Name: A descriptive name for your prompt (max 256 characters).
Prompt: The question or instruction for the AI (max 10,000 characters).
Schedule: Configure either:
Rate (Periodic): Run at fixed time interval (minimum 5 minutes).
Cron Expression: Run at specific dates and times using Cron expressions (minimum 5 minutes).
Run As (Optional): If you have the AI Run As permission, you can specify a different user account or API token whose permissions the AI will execute. If left blank, the prompt will run with your permissions.
Enable on creation: Toggle
ONfor the prompt to run on its configured schedule. Defaults toON.
Click Create to save your scheduled prompt.
Scheduled prompt permissions
Access to scheduled prompts is controlled by two permissions:
View Scheduled Prompts — view prompts, their run history, and download them as YAML. Included in the default
Admin,Analyst, andAnalystReadOnlyroles (implied by Run Panther AI).Manage Scheduled Prompts — create, edit, delete, enable/disable, and bulk-import prompts. Included in the default
Adminrole only, and not automatically granted to non-Adminroles on upgrade. An admin can grant it in Settings > Roles.
See RBAC for details.
Run-as identity and data access
By default, scheduled prompts run with the creator's permissions. However, users with the AI Run As permission can configure a prompt to run as a specific user or API token instead. The AI uses the same data access, tool permissions, and role restrictions as the configured run-as identity. This means:
The prompt can only access log types, alerts, and detections that the run-as identity's (or creator's) role permits.
If the run-as identity's (or creator's) role permissions are later reduced, the prompt's capabilities are reduced accordingly — it will no longer be able to access data or perform actions beyond the updated permissions.
If the run-as user's (or creator's) account is deleted or disabled, the prompt is automatically disabled and marked as failed.
Limits
There is a limit of 100 enabled scheduled prompts per Panther instance (across all users).

View scheduled prompt results
To view the results of a scheduled prompt run:
In the left-hand navigation bar of your Panther Console, click Panther AI > Scheduled Prompts.
Click the name of a scheduled prompt to open its detail page.
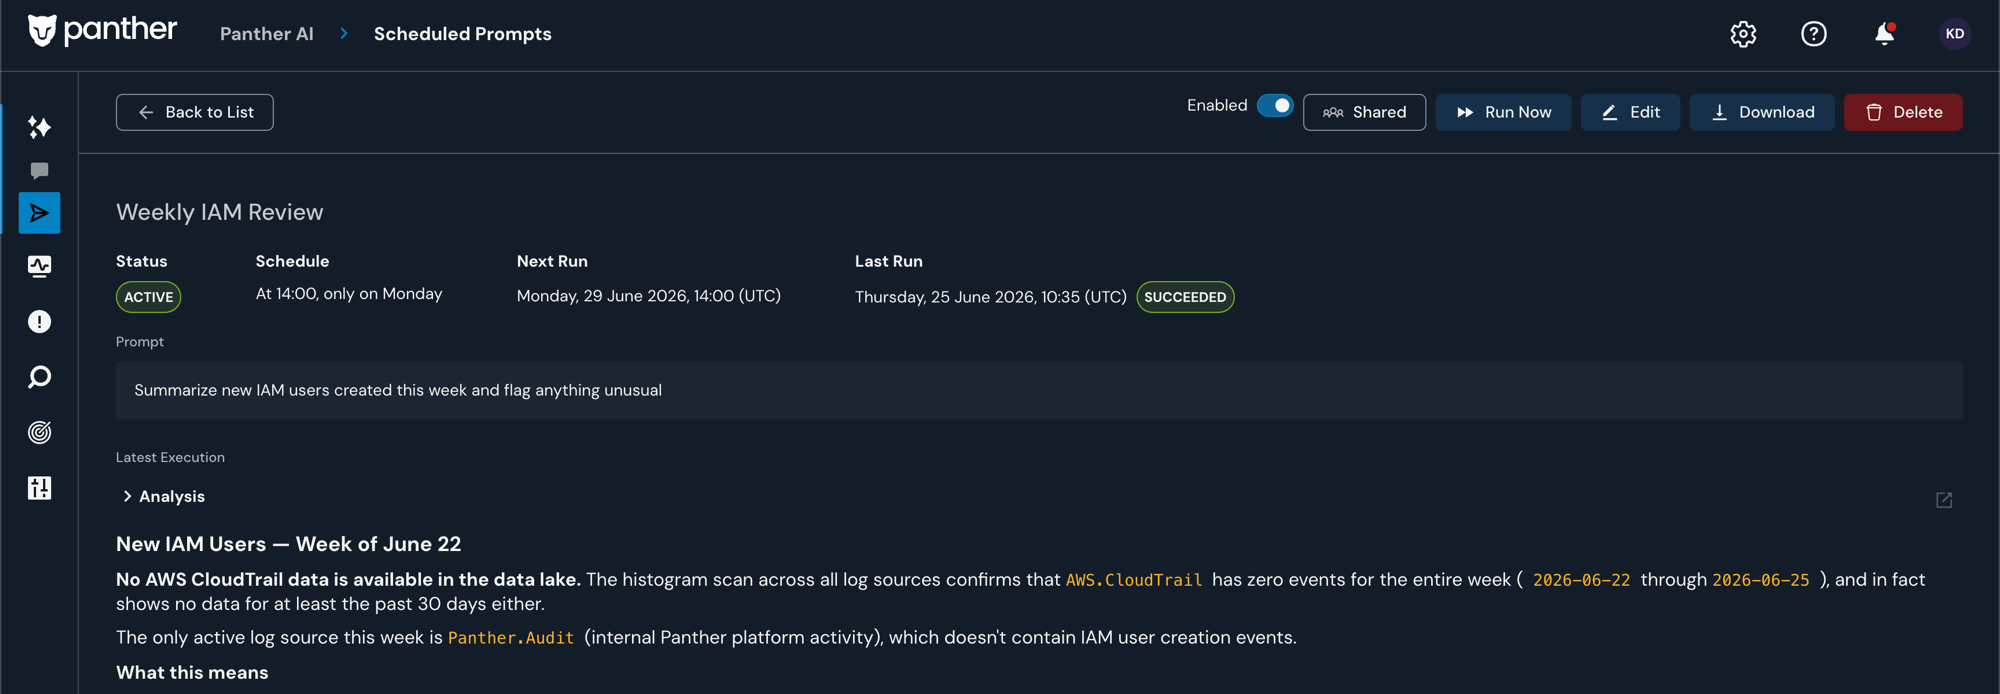
The detail page displays the AI response from the most recent run. Click the Open in full screen icon to open the conversation in the Panther AI view.

The detail page also displays the following run information:
Status — Whether the prompt is currently
ACTIVEorDISABLED.Schedule — The configured run frequency.
Next Run — The next scheduled execution time (only shown when the prompt is enabled).
Last Run — The scheduled time of the most recent execution and its status:
SUCCEEDED,FAILED, orRUNNING.Errors — If the most recent run failed, a description of the error is displayed below the run status.
If the prompt has not yet executed, the detail page displays the next scheduled run time.
Manage scheduled prompts
Edit a scheduled prompt
Navigate to Panther AI > Scheduled Prompts.
To open the edit modal, do one of the following:
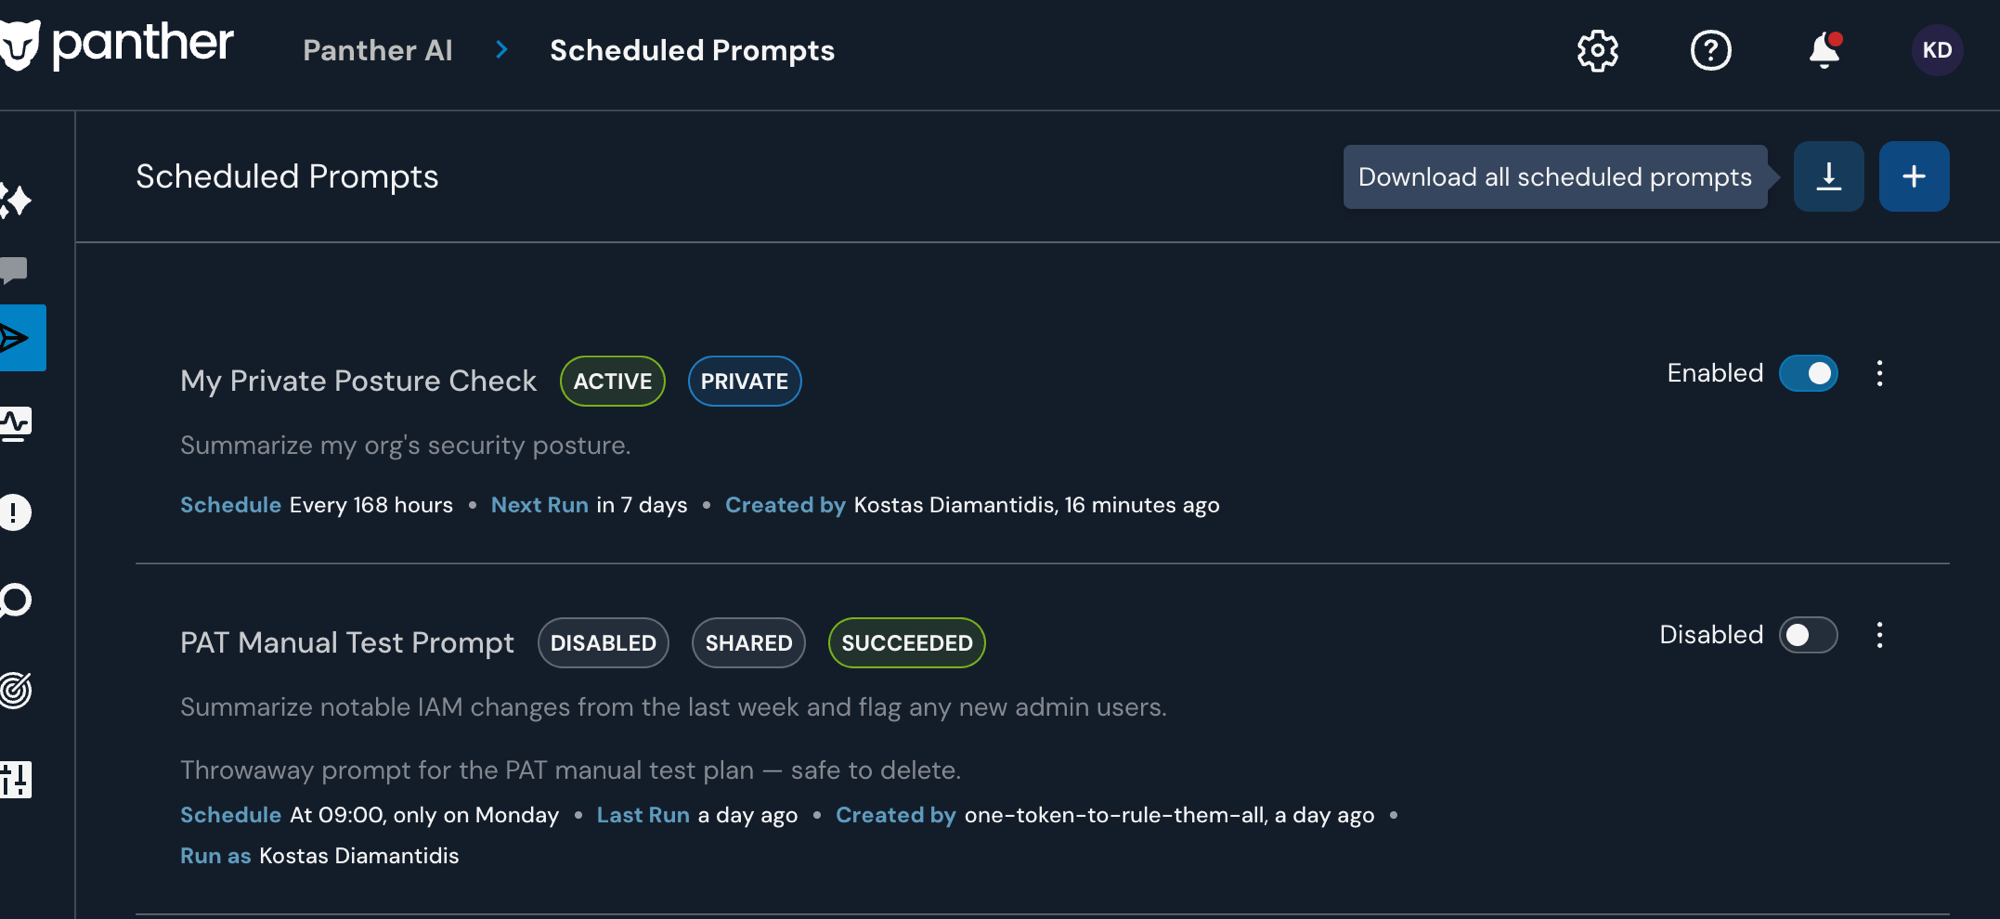
On the prompt card, click the ⋯ menu > Edit.
On the prompt detail page, click Edit.
Update the desired fields and click Update.
Enable or disable a scheduled prompt
A disabled prompt is saved but does not run until re-enabled. To enable or disable a prompt:
On the prompt card, use the toggle switch on the right side of the card.
On the prompt detail page, use the toggle switch in the page header.
Delete a scheduled prompt
To open the delete confirmation, do one of the following:
On the prompt card, click the ⋯ menu > Delete.
On the prompt detail page, click Delete.
Confirm the deletion. The prompt is immediately removed from the schedule.
Manage scheduled prompts as code
You can manage scheduled prompts as YAML files — download them, keep them in version control, edit them, and re-import them — the same way you manage detections. This lets you review prompts in pull requests and deploy them through CI/CD.
Bulk upload is shared-only: a prompt with Private: true is rejected on import. You can download a private prompt for backup, but it will fail to re-import. Importing or downloading prompts requires the permissions described above.
Download
On a prompt's detail page, click Download to export it as a single
.ymlfile.On the Scheduled Prompts list page, click Download all to export every prompt as a
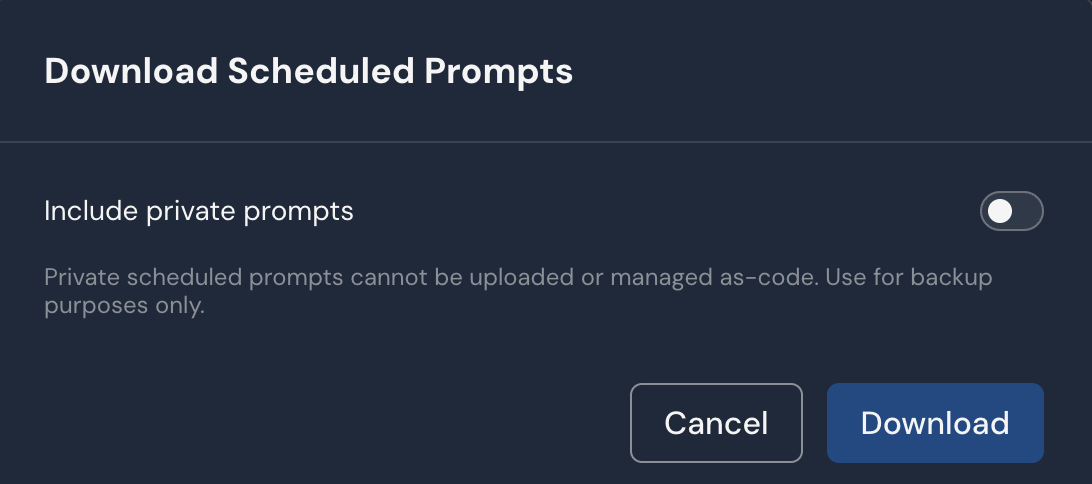
.zipof.ymlfiles. Downloads are shared-only by default; if the list contains private prompts, a popup offers an Include private prompts toggle (off by default; private prompts are exported for backup only and cannot be re-imported).
Upload
Re-import edited prompts through the Bulk Uploader in the Console — the same tool used for detections. The uploader identifies each file by its AnalysisType: scheduled_prompt, so no special folder layout is required.
Use the Panther Analysis Tool (PAT) to validate and upload prompts from a detections repository:
Uploading scheduled prompts requires API-token authentication — AWS-profile authentication is not supported for prompts. See Managing scheduled prompts with PAT for the full workflow and required permissions.

When the loaded list contains a private prompt, Download all opens a popup with an Include private prompts toggle (off by default). Private prompts are exported for backup only and cannot be re-imported.

YAML specification
Each prompt is a single YAML document. Exactly one prompt per file.
AnalysisType
Identifies the file as a scheduled prompt.
Must be scheduled_prompt.
PromptName
Unique identifier (the upsert key). Must be unique among live shared prompts.
Lowercase letters, digits, and underscores, starting with a lowercase letter (^[a-z][a-z0-9_]*$). Max 128 characters.
DisplayName
Human-readable label shown in the Console.
String, max 256 characters.
PromptText
The instruction sent to Panther AI.
String, max 10,000 bytes.
RunAsUser
The identity the prompt runs as. The target must hold the Run Panther AI permission. Binding to an identity other than the importer requires AI Run As.
A user email address or a Panther API-token ID (begins with po_).
Schedule
When the prompt runs.
An object containing exactly one of CronExpression or RateMinutes (≥ 5), plus TimeoutMinutes (1–15). See Cron expressions.
Description
Optional description.
String, max 2,000 characters.
OutputLength
Optional. Controls the length and detail of the response.
One of small (Basic), medium (Standard), or largest (Advanced).
Private
Optional. Bulk upload is shared-only.
Must be false or omitted. true is rejected on import.
Enabled
Optional. Whether the prompt runs on its schedule.
Boolean. Defaults to false when omitted. Downloads always include the explicit current value, so a re-imported prompt preserves its enabled state. If you hand-author a YAML and want it to run, set Enabled: true
Re-importing prompts
The upsert key is PromptName, scoped to shared prompts. Re-importing a file updates the existing shared prompt in place and preserves its owner — it does not create a duplicate. To retire a prompt as code, set Enabled: false and re-import (there is no delete-via-upload; hard-delete is done in the Console).
A freshly downloaded shared prompt re-imports with no changes. One exception: a prompt that had no explicit run-as identity is updated once on its first re-import, to pin an explicit RunAsUser.
Last updated
Was this helpful?