> For the complete documentation index, see [llms.txt](https://docs.panther.com/llms.txt). Markdown versions of documentation pages are available by appending `.md` to page URLs; this page is available as [Markdown](https://docs.panther.com/data-onboarding/supported-logs/okta.md).
# Okta Logs
Panther supports pulling logs directly from Okta
## Overview
Panther has the ability to fetch Okta events by querying the [Okta System Log API](https://developer.okta.com/docs/reference/api/system-log/). Panther will query the System Log API every 1 minute. In order for Panther to access the API you need to create a new API token or use an existing one.
You can also enable [Okta user and device profiles](/enrichment/okta.md).
**Identity Threat Protection (ITP) Support**: Panther's Okta.SystemLog schema includes fields for Okta Identity Engine with Identity Threat Protection enabled. These fields capture enrichment data including bot protection, IP reputation, risk scoring, and user behavior analysis that enhance security visibility when ITP features are active in your Okta environment.
## How to onboard Okta logs to Panther
{% tabs %}
{% tab title="Okta API polling" %}
### Step 1: Create a new Okta API token
{% hint style="info" %}
To create an Okta API token with permissions to query System Logs, you must be logged in as one of the following types of Okta administrator: a [super administrator](https://help.okta.com/en-us/Content/Topics/Security/administrators-super-admin.htm), [organization administrator](https://help.okta.com/en-us/Content/Topics/Security/administrators-org-admin.htm), or [read-only administrator](https://help.okta.com/en-us/Content/Topics/Security/administrators-read-only-admin.htm).
We recommend using a [read-only administrator](https://help.okta.com/en-us/Content/Topics/Security/administrators-read-only-admin.htm) role, for least privilege.
See [Okta's documentation](https://help.okta.com/en-us/Content/Topics/Security/Administrators.htm) for more information on managing administrator roles.
{% endhint %}
1. Log in as Okta administrator.
2. In the Okta Admin Console, navigate to **Security** > **API.**
3. Navigate to the **Tokens** tab.
4. Click **Create token.**
5. Enter a descriptive name for your token, e.g., `Panther API token`.
6. Copy the **Token value** and store it in a secure location. You will need it in the next steps.
* **Note**: Okta will not display this value again.
### Step 2: Create a new Okta source in Panther
1. In the left-hand navigation bar of your Panther Console, click **Log Sources**.
2. Click **Create New.**
3. Search for “Okta,” then click its tile.
4. On the slide-out panel, click **Start Setup**.
5. On the **Configuration** page, fill in the following fields:
* **Name**: Enter a descriptive name for the source, e.g. `My Okta logs`.
* **Okta subdomain**: Enter the subdomain of your Okta organization domain. You can refer to [Okta documentation](https://developer.okta.com/docs/guides/find-your-domain/main/) to find out more about your Okta org domain.
* **Okta domain**: Select the appropriate domain name from the Okta domain drop-down.
* **API Token**: Enter the token value you generated in the previous step.
6. Click **Setup**.
7. On the **Enrichment** page, if you would like to enable [Okta Identity Profiles](/enrichment/okta.md), to the right of **User Profiles** and/or **Device Profiles**, click the toggle `ON`.
* Note [the prerequisite for enabling Okta device profiles](/enrichment/okta.md#prerequisite-for-okta-device-profiles).
* For each of the toggles set to `ON`, set a **Refresh period (min)**. This represents the cadence at which Panther will update profile data with what is stored in Okta.
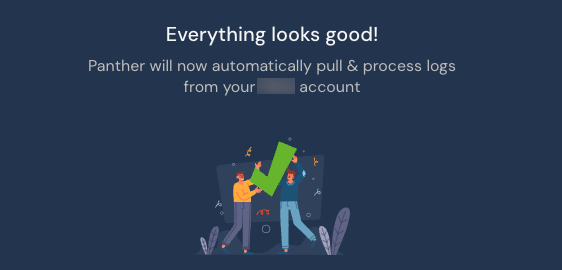
8. Click **Setup**. You will be directed to a success screen:\\
* You can optionally enable one or more [Detection Packs](https://docs.panther.com/detections/panther-managed/packs).
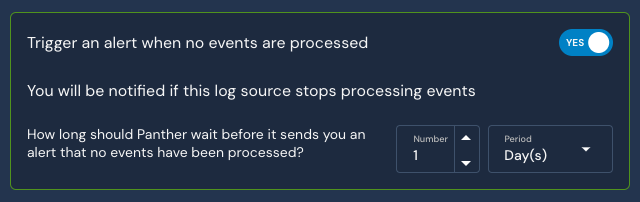
* The **Trigger an alert when no events are processed** setting defaults to **YES**. We recommend leaving this enabled, as you will be alerted if data stops flowing from the log source after a certain period of time. The timeframe is configurable, with a default of 24 hours.
{% endtab %}
{% tab title="Okta Log Streaming (Closed Beta)" %}
### Step 1: Set up Okta Log Streaming
{% hint style="warning" %}
This onboarding method does not support [Enrichments](/enrichment.md).
{% endhint %}
{% hint style="info" %}
To setup Okta Log Streaming you must be logged in as a [super administrator](https://help.okta.com/en-us/Content/Topics/Security/administrators-super-admin.htm).
See [Okta's documentation](https://help.okta.com/en-us/Content/Topics/Security/Administrators.htm) for more information on managing administrator roles.\
\
You will also need access to the AWS console of your Panther account.
{% endhint %}
1. Log in as ab Okta [super administrator](https://help.okta.com/en-us/Content/Topics/Security/administrators-super-admin.htm).
2. In the Okta Admin Console, navigate to **Reports** > **Log Streaming.**
3. Click **Add New**.
4. Click **AWS EventBridge**.
5. Enter a descriptive name for your source, e.g., `Panther API token`, a descriptive name of the Bus, the AWS region and the AWS account-id of your Panther instance.
* You can find your region in the **Main Info & Preferences** section of the Settings page in the Panther Console.
6. Click **Save**. You will find said EventBridge association in your AWS account.
### Step 2: Create a new Okta source in Panther
1. Log into your AWS account, and navigate to **Amazon Eventbridge.**
2. Navigate to **Integration** > **Parter event sources.**
3. Click on the newly created event source and click **Associate with EventBus.**
4. Keep note of the name of the associated EventBridge bus as displayed in the console.
5. In Panther Console, navigate to the left-hand navigation bar and click **Log Sources**.
6. Click **Create New.**
7. Search for “Okta Streaming” then click its tile.
8. Click **Start Setup**.
9. On the **Configuration** page, fill in the following fields:
* **Name**: Enter a descriptive name for the source, e.g. `My Okta logs`.
* **Bus Name**: Enter the EventBridge Bus ARN you associated in the steps above.
* If you don't have easy access to your AWS account console you can try this name and the association will happen automatically
```
aws.partner/okta.com/integrator-9763277/
```
10. Click **Setup**.
{% endtab %}
{% endtabs %}
### Panther-managed detections
See [Panther-managed](/detections/panther-managed.md) rules for Okta in the [panther-analysis GitHub repository](https://github.com/panther-labs/panther-analysis/tree/main/rules/okta_rules). These include:
* [Okta Admin Role Assigned](https://github.com/panther-labs/panther-analysis/blob/cd220c87982011d4ad156c7daecd2857c358d154/rules/okta_rules/okta_admin_role_assigned.py) - A user has been granted administrative privileges in Okta
* [Okta API Key Created](https://github.com/panther-labs/panther-analysis/blob/cd220c87982011d4ad156c7daecd2857c358d154/rules/okta_rules/okta_api_key_created.py) - A user created an API Key in Okta
* [Okta API Key Revoked](https://github.com/panther-labs/panther-analysis/blob/cd220c87982011d4ad156c7daecd2857c358d154/rules/okta_rules/okta_api_key_revoked.py) - A user has revoked an API Key in Okta
* [Geographically Improbable Okta Login](https://github.com/panther-labs/panther-analysis/blob/cd220c87982011d4ad156c7daecd2857c358d154/rules/okta_rules/okta_geo_improbable_access.py) - A user has subsequent logins from two geographic locations that are very far apart
* [Okta MFA Globally Disabled](https://github.com/panther-labs/panther-analysis/blob/cd220c87982011d4ad156c7daecd2857c358d154/rules/okta_rules/okta_admin_disabled_mfa.py) - Okta system-wide MFA has been disabled by an Admin user
* [Okta Support Reset Credential](https://github.com/panther-labs/panther-analysis/blob/cd220c87982011d4ad156c7daecd2857c358d154/rules/okta_rules/okta_support_reset.py) - Okta Support reset a password or MFA for a user
* [Okta Support Access Granted](https://github.com/panther-labs/panther-analysis/blob/cd220c87982011d4ad156c7daecd2857c358d154/rules/okta_rules/okta_account_support_access.py) - Okta support access was granted
## Custom detections
#### Suspicious behavior reported example
A user has reported suspicious behavior from their account:
```python
def rule(event):
if event.get('eventtype') == 'user.account.report_suspicious_activity_by_enduser':
return True
```
#### Custom detection patterns
Below are some common functions and example [`deep_get()`](/detections/rules/python.md#deep_get) uses when writing custom detections for Okta logs. Find more information on the various event types in the Okta [documentation](https://developer.okta.com/docs/reference/api/event-types/).
```python
#Okta has many event types that are listed here. You can begin your detection based on one of these eventtypes
#https://developer.okta.com/docs/reference/api/event-types/
event.get('eventtype')
#To access the city, state, lat, lon etc.
deep_get(event, 'client', 'geographicalContext', 'city')
deep_get(event, 'client', 'geographicalContext', 'state')
deep_get(event, 'client', 'geographicalContext', 'country')
deep_get(event, 'client', 'geographicalContext', 'geolocation', 'lon')
deep_get(event, 'client', 'geographicalContext', 'geolocation', 'lat')
#Details on the source of the event
deep_get(event, 'client' 'device')
deep_get(event, 'client', 'ipAddress')
deep_get(event, 'client', 'userAgent')
deep_get(event, 'actor', 'alternateId')
deep_get(event, 'actor', 'displayName')
## Global helpers that may be useful with Okta
# within panther_base_helpers
def okta_alert_context(event: dict):
"""Returns common context for automation of Okta alerts"""
return {
"ips": event.get("p_any_ip_addresses", []),
"actor": event.get("actor", ""),
"target": event.get("target", ""),
"client": event.get("client", ""),
}
# within panther_base_helpers
def is_ip_in_network(ip_addr, networks):
"""Check that a given IP is within a list of IP ranges"""
return any(ip_address(ip_addr) in ip_network(network) for network in networks)
```
## Supported log types
### Okta.SystemLog
The Okta System Log records system events related to your organization in order to provide an audit trail that can be used to understand platform activity and to diagnose problems.
Reference: [Okta Documentation on System Log APIs.](https://developer.okta.com/docs/reference/api/system-log/)
```yaml
schema: Okta.SystemLog
description: |
The Okta System Log records system events related to your organization in order to provide an audit trail that can be used to understand platform activity and to diagnose problems.
referenceURL: https://developer.okta.com/docs/reference/api/system-log/
fields:
- name: uuid
required: true
description: Unique identifier for an individual event
type: string
- name: published
required: true
description: Timestamp when event was published
type: timestamp
timeFormat: rfc3339
isEventTime: true
- name: eventType
required: true
description: Type of event that was published
type: string
- name: version
required: true
description: Versioning indicator
type: string
- name: severity
required: true
description: 'Indicates how severe the event is: DEBUG, INFO, WARN, ERROR'
type: string
- name: legacyEventType
description: Associated Events API Action objectType attribute value
type: string
- name: displayMessage
description: The display message for an event
type: string
- name: actor
description: Describes the entity that performed an action
type: object
fields:
- name: id
required: true
description: ID of actor
type: string
- name: type
required: true
description: Type of actor
type: string
- name: alternateId
description: Alternative id of the actor
type: string
indicators:
- email
- name: displayName
description: Display name of the actor
type: string
- name: details
description: Details about the actor
type: json
- name: detailEntry
description: Detail entry
type: json
- name: client
description: The client that requested an action
type: object
fields:
- name: id
description: For OAuth requests this is the id of the OAuth client making the request. For SSWS token requests, this is the id of the agent making the request.
type: string
- name: userAgent
description: The user agent used by an actor to perform an action
type: object
fields:
- name: browser
description: If the client is a web browser, this field identifies the type of web browser (e.g. CHROME, FIREFOX)
type: string
- name: os
description: The Operating System the client runs on (e.g. Windows 10)
type: string
- name: rawUserAgent
description: A raw string representation of the user agent, formatted according to section 5.5.3 of HTTP/1.1 Semantics and Content. Both the browser and the OS fields can be derived from this field.
type: string
- name: geographicalContext
description: The physical location where the client made its request from
type: object
fields:
- name: geolocation
description: Contains the geolocation coordinates (latitude, longitude)
type: object
fields:
- name: lat
description: Latitude
type: float
- name: lon
description: Longitude
type: float
- name: city
description: The city encompassing the area containing the geolocation coordinates, if available (e.g. Seattle, San Francisco)
type: string
- name: state
description: Full name of the state/province encompassing the area containing the geolocation coordinates (e.g. Montana, Incheon)
type: string
- name: country
description: Full name of the country encompassing the area containing the geolocation coordinates (e.g. France, Uganda)
type: string
- name: postalCode
description: Full name of the country encompassing the area containing the geolocation coordinates (e.g. France, Uganda)
type: string
- name: zone
description: The name of the Zone that the client's location is mapped to
type: string
- name: ipAddress
description: Ip address that the client made its request from
type: string
indicators:
- ip
- name: device
description: Type of device that the client operated from (e.g. Computer)
type: string
- name: request
description: The request that initiated an action
type: object
fields:
- name: ipChain
description: If the incoming request passes through any proxies, the IP addresses of those proxies will be stored here in the format (clientIp, proxy1, proxy2, ...).
type: array
element:
type: object
fields:
- name: ip
description: IP address
type: string
indicators:
- ip
- name: geographicalContext
description: Geographical context of the IP address
type: object
fields:
- name: geolocation
description: Contains the geolocation coordinates (latitude, longitude)
type: object
fields:
- name: lat
description: Latitude
type: float
- name: lon
description: Longitude
type: float
- name: city
description: The city encompassing the area containing the geolocation coordinates, if available (e.g. Seattle, San Francisco)
type: string
- name: state
description: Full name of the state/province encompassing the area containing the geolocation coordinates (e.g. Montana, Incheon)
type: string
- name: country
description: Full name of the country encompassing the area containing the geolocation coordinates (e.g. France, Uganda)
type: string
- name: postalCode
description: Full name of the country encompassing the area containing the geolocation coordinates (e.g. France, Uganda)
type: string
- name: version
description: IP version
type: string
- name: source
description: Details regarding the source
type: string
- name: ipDetails
description: Details about the associated IP address
type: object
fields:
- name: asNumber
description: The autonomous system number that's associated with the IP address
type: bigint
- name: asOrg
description: The name associated with the Autonomous System Number (ASN)
type: string
- name: domain
description: The domain name associated with the IP address
type: string
indicators:
- domain
- name: ipServiceCategories
description: IP service categories associated with the IP address
type: array
element:
type: string
- name: isp
description: The internet service provider associated with the IP address
type: string
- name: outcome
description: The outcome of an action
type: object
fields:
- name: result
description: 'Result of the action: SUCCESS, FAILURE, SKIPPED, ALLOW, DENY, CHALLENGE, UNKNOWN'
type: string
- name: reason
description: Reason for the result, for example INVALID_CREDENTIALS
type: string
- name: target
description: Zero or more targets of an action
type: array
element:
type: object
fields:
- name: id
required: true
description: ID of target
type: string
- name: type
required: true
description: Type of target
type: string
- name: alternateId
description: Alternative id of the target
type: string
- name: displayName
description: Display name of the target
type: string
- name: details
description: Details about the target
type: json
- name: detailEntry
description: Detail entry
type: json
- name: changeDetails
description: Detail on changes
type: json
- name: transaction
description: The transaction details of an action
type: object
fields:
- name: id
description: Unique identifier for this transaction.
type: string
- name: type
description: Describes the kind of transaction. WEB indicates a web request. JOB indicates an asynchronous task.
type: string
- name: detail
description: Details for this transaction.
type: json
- name: debugContext
description: The debug request data of an action
type: object
fields:
- name: debugData
description: Dynamic field containing miscellaneous information dependent on the event type.
type: json
- name: authenticationContext
description: The authentication data of an action
type: object
fields:
- name: authenticationProvider
description: The system that proves the identity of an actor using the credentials provided to it
type: string
- name: authenticationStep
description: The zero-based step number in the authentication pipeline. Currently unused and always set to 0.
type: int
- name: credentialProvider
description: A credential provider is a software service that manages identities and their associated credentials. When authentication occurs via credentials provided by a credential provider, that credential provider will be recorded here.
type: string
- name: credentialType
description: The underlying technology/scheme used in the credential
type: string
- name: rootSessionId
type: string
- name: issuer
description: The specific software entity that created and issued the credential.
type: object
fields:
- name: id
description: Varies depending on the type of authentication. If authentication is SAML 2.0, id is the issuer in the SAML assertion. For social login, id is the issuer of the token.
type: string
- name: type
description: Information regarding issuer and source of the SAML assertion or token.
type: string
- name: externalSessionId
description: A proxy for the actor's session ID
type: string
- name: interface
description: The third party user interface that the actor authenticates through, if any.
type: string
- name: authenticatorProvider
description: 'DEPRECATED: This field is kept here for backwards compatibility.'
type: string
- name: authenticatorContext
description: The binding context of the authenticator used to satisfy the authentication request (for example, a Platform SSO/SSO extension binding).
type: object
fields:
- name: applicationVersion
description: The version of the application that requested the authenticator binding
type: string
- name: binaryIdentifier
description: The identifier of the binary that requested the authenticator binding
type: string
- name: binaryPath
description: The filesystem path of the binary that requested the authenticator binding
type: string
- name: bindingMethod
description: The method used to bind the authenticator to the request (for example, APPLE_SSO_EXTENSION or LOOPBACK)
type: string
- name: operator
description: The name of the service operator
type: string
- name: securityContext
description: The security data of an action
type: object
fields:
- name: asNumber
description: Autonomous system number associated with the autonomous system that the event request was sourced to
type: bigint
- name: asOrg
description: Organization associated with the autonomous system that the event request was sourced to
type: string
- name: isp
description: Internet service provider used to sent the event's request
type: string
- name: domain
description: The domain name associated with the IP address of the inbound event request
type: string
indicators:
- domain
- name: isProxy
description: Specifies whether an event's request is from a known proxy
type: boolean
- name: botProtection
description: The result of the bot protection detection associated with the event
type: object
fields:
- name: level
description: The bot detected level associated with the bot protection configuration target
type: string
- name: ipDetails
description: Details about the associated IP address
type: object
fields:
- name: asNumber
description: The autonomous system number that's associated with the IP address
type: bigint
- name: asOrg
description: The name associated with the Autonomous System Number (ASN)
type: string
- name: domain
description: The domain name associated with the IP address
type: string
indicators:
- domain
- name: ipServiceCategories
description: IP service categories associated with the IP address
type: array
element:
type: string
- name: isp
description: The internet service provider associated with the IP address
type: string
- name: risk
description: Risk associated with the event
type: object
fields:
- name: detectionName
description: The name of the detection mechanism that identified the risk
type: string
- name: issuer
description: The entity that issued the associated risk
type: string
- name: level
description: The risk level associated with the request
type: string
- name: previousLevel
description: The previous risk level (if any) associated with the user
type: string
- name: userBehaviors
description: The result of the user behavior detection models associated with the event
type: array
element:
type: object
fields:
- name: id
description: The unique identifier of the user behavior detection model
type: string
- name: name
description: The name of the user behavior detection model configured by admins
type: string
- name: result
description: The result of the user behavior analysis
type: string
```
---
# Agent Instructions
This documentation is published with GitBook. GitBook is the documentation platform designed so that both humans and AI agents can read, navigate, and reason over technical content effectively. Learn more at gitbook.com.
## Querying This Documentation
If you need additional information that is not directly available in this page, you can query the documentation dynamically by asking a question.
Perform an HTTP GET request on the current page URL with the `ask` query parameter, and the optional `goal` query parameter:
```
GET https://docs.panther.com/data-onboarding/supported-logs/okta.md?ask=&goal=
```
`ask` is the immediate question: it should be specific, self-contained, and written in natural language.
`goal` is optional and describes the broader end goal you are ultimately trying to accomplish on behalf of the user. GitBook uses it to tailor the answer towards what is most useful for that goal.
The response will contain a direct answer to the question and relevant excerpts and sources from the documentation.
Use this mechanism when the answer is not explicitly present in the current page, you need clarification or additional context, or you want to retrieve related documentation sections.